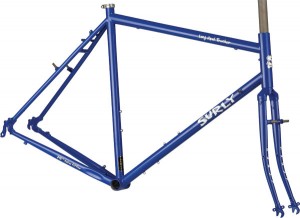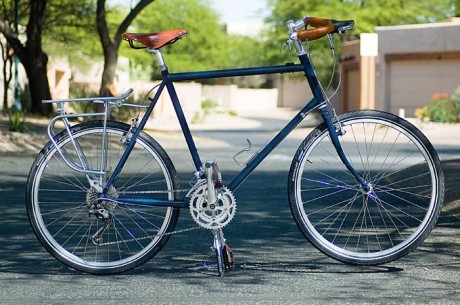
A few months ago I purchased a Surly Long Haul Trucker frame and fork on Craigslist. I wasn’t a fan of the color, but the price was too good to pass up.
I decided I’d get it powder coated in a color that I actually liked. I did some research about companies in town who do powder coating, all of which would have cost about $150.
While I was investigating my options, I ran across a post on Craigslist by Steve Backenkeller who said he powder coated bicycles.
We emailed back and forth and I selected a few colors I thought I might like. Backenkeller and I met and he brought samples of each of the colors I requested including samples with metallic flakes and clear coating.
Here is a Q&A with Backenkeller to learn a little more about how he started powder coating bicycles.
Name: Steve Backenkeller
Years powder coating: 2 years
How did you get into powder coating?
My father-in-law does his own things where he lives in Illinois and I would always take parts with me when we went to visit. I then finally got my own system and oven to do my own parts. I then started doing stuff for friends and finally decided to get paid for it and started advertising.
When and how did you start powder coating bicycles?
Friends of mine own the company D3 BMX Frames, www.d3bmx.com, and run Manzanita BMX race park. Well, I was doing mostly automotive parts for people and offered to do their small parts in my household oven. As soon as they heard that, they asked if I could do frames, and I couldn’t at first because of my small oven. With their encouragement and wanting to grow, I built a larger oven to fit multiple frames and larger parts.
My frame was very basic, but how complicated can you get?
I’ve done some multiple colors, but it’s very detailed with the masking and knowing the exact time to pull out of the oven to get clean lines. There are also some really neat colors in candies, transparents, and neons that require multiple coats to get the full extent of the brilliance and “pop” of color. Clear coating in gloss, semi-gloss, and matte can give the base powder the needed gloss and added protection from chipping and UV decay.
What are the challenges of powder coating bicycles?
First is the preparation. Removing the original finish can be challenging with all the welds and small areas. Applying powder is an electro-static process, so the powder gets a positive charge coming out the gun and is attracted to the negative charged part. Well, so areas, like 90 degree corners, get what’s called a Faraday affect that actually repels the powder in those areas. It’s just been a trial and error to get it perfected. Transparent powders are also a challenge as the base color comes through and getting an even coat is challenging.
What is the price range for powder coating bikes?
Prices start a $60 for a bare frame and go up from there depending on color selection. (My Long Haul Trucker was $75 with the clear coat added.)
What is the process to powder coat?
Start with bare metal (steel, brass, aluminum, copper, etc.), usually “pre-bake” to bake out any contaminates in the metal that would affect the finish. Once cooled, wipe with denatured alcohol, torch off fuzzies left by rag, air blow part, and spray on powder. Powder goes on about 3 mil thick. Part goes into oven at 375-385 degrees and once the part reaches that temp, it cures for 15-20 minutes at that temp. Once part is cooled, powder is cured and complete, unless a second coat is needed. That only consists of putting on a second coat and curing again.
You can Steve at bfr57@yahoo.com


Steve’s contact links are producing error messages.
His email is bfr57@yahoo.com
Nice-looking real world, multipurpose bike. Good job! It lacks “Surly” decals (Surly sells them), so we wonder if that was intentional, by design, or if there is something about the powder coating that ruled them out?
The lack of decals is by design, but the powder coating process removes them.
The paint is sandblasted and with it the decals.
I don’t like the look of the Surly decals, plus I think thieves target them more.
I have a front rack and fenders on the way for it.
Anyway, good choice with the Schwalbe (Marathon?) tires…heavy, but about as Tucson-proof as one can get.
Thanks for fixing the contact links. Hmmmm, I may get in touch with him re: painting an old frame with sentimental value.
Mike,
Steve here. Great article, made me blush a little…..
Your bike turned out awesome and I’ve had an inquiry for some powder coating. Thanks!!
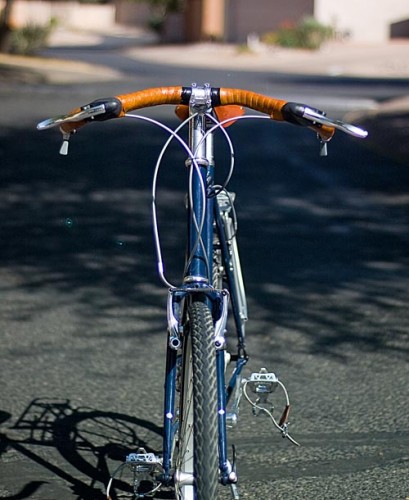
Mike, enjoyed your article about the powder coating of the your bike frame. I am also interested in the handlebar you chose. Could you tell me what it is? Thanks.
Mark (tattriem@gmail.com)
After reading the article on Steve, I contacted him to have my 1986 Cannondale ST-800 touring frame/fork repainted. Interestingly, I’d purchased the Cannondale in Tucson in 1987 when I lived there. Steve sent the website URL to look at available colors. Picked a color, brought the frame/fork to Tucson for Steve to do his magic, and, voila, a brand new bike! It looks great and is even better looking after I put it all back together with some other upgraded components. I get comments on my “antique” bike all the time. Cost me $120 and worth every penny. It only took Steve a few days to complete the powder coat paint job. You can check out the bike at: http://www.patricklyford.com
Patrick Lyford
Silver City, NM
Wow, that powder coating job looks incredible. Thanks for the information on how to do it! I think I will try powder coating some stuff now. Hopefully I can get as good of results as you did.
http://www.tristatefabricators.com/PowderCoating.htm